You may have seen the ACL and others live stream cornhole games, cornhole games during conferences or maybe you’re a gamer and you watch others live stream on twitch. Well guess what!? You can too!! And we will tell you exactly how!!
So let me start off by saying, this won’t be an inexpensive way to live stream cornhole games with OBS but at least the software itself is free. OBS (Open Broadcast Software) Studio is an open source software that is used for video recording or live streaming on Windows, Mac or Linux. Although the software wont cost you anything, the other parts of this puzzle that you’ll need will! Unless of course you already have them!
What you need to live stream cornhole games
- Laptop, with the following specs & OS
- CPU requirements may vary, depending on the encoder, resolution, FPS & scene complexity. I would recommend an i5 or newer gen CPU with at least 8GB RAM
- Windows specs
- DirectX 10.1 compatible GPU
- Windows 7 SP1 or newer (Recommend newer OS)
- MacOS
- Intel CPU
- OpenGL 3.2 compatible GPU
- MacOS 10.12 or newer
- Linux/Unix
- OpenGL 3.2 compatible GPU
- X window system
- At least one camera (I’m using a Logitech c922x HD Camera), but if you want to display both boards, you’ll need two.
- One or two tripods are best but not required.
- 16ft Active USB Extension cables, I use these to have my tripods closer to the boards, this allows me to setup my pc further away.
Once you have these components, download OBS Studio HERE & install the application on your laptop, no special installation instructions, just follow the prompts and you to will be able to live stream cornhole games with OBS in no time!
Streaming with OBS next steps
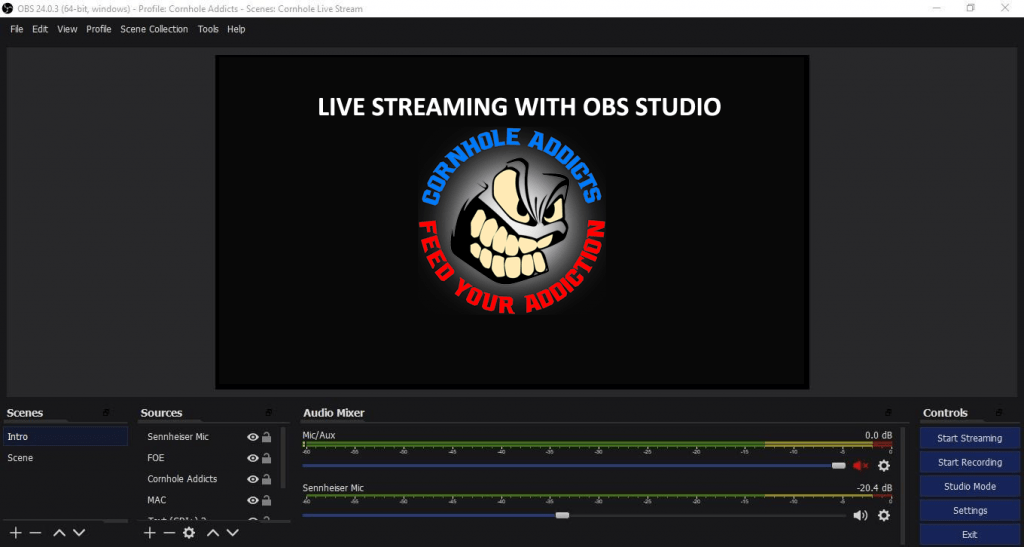
Now that you have OBS installed, you’ll need to create your scene or scenes. As you can see from the pictures below, I have two scenes setup, one is an intro scene with some of our logos. You can add whatever logo you want, I prefer to use png files with transparent backgrounds, it just looks better as an overlay to your video.
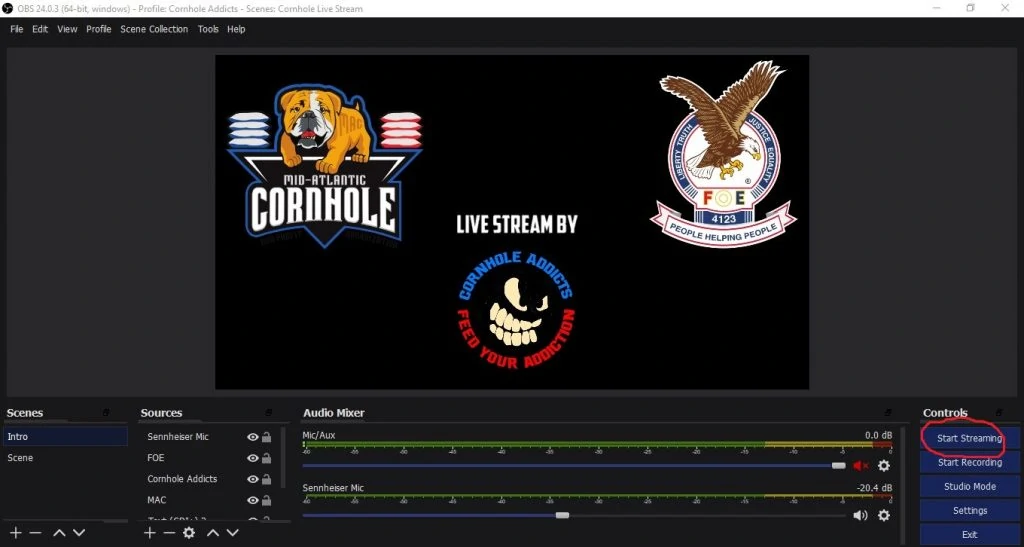
Using the + button under scenes, will allow you to create additional scenes. The sources box is where you will be able to add text, logos, browsers (Scoreholio Widget), video capture devices, audio captures and more! Here I have created my intro scene with a couple logos and some text. Once I start my live stream, I’ll use this intro portion to display first, once play begins, I can then transition to the main scene with the cameras.

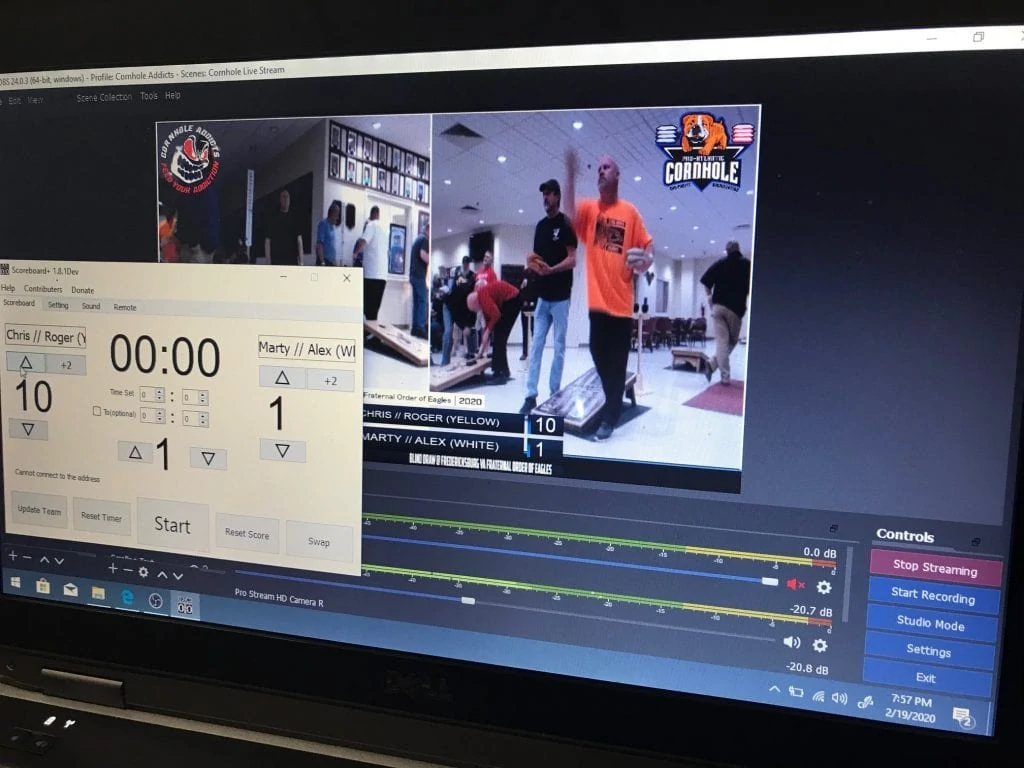
This portion has a little bit more going on, I have some white lines setup as a border and a separator from each camera feed. Adding everything to this scene is done via sources by clicking the + button. Here you will add your cameras and logos. As you can also see there is a custom scoreboard layout, a lot of people tend to use scoreholio to accomplish this, this is an image, whereas scoreholio uses a live widget via a browser.
I use an application that’s run on my laptop (see first picture above), it creates team names and scores. I accomplish this by creating another source that pulls from text files the scoreboard app creates. The scoreboard app makes the changes to the text files by adding/updating team names and the scores. Each box you see is a different text file that’s set on top of the scoreboard overlay, I won’t get into too much detail, but there’s also some other settings using transform to allow that particular text resolution to change as the names get longer or smaller.
Setting up the cameras is also done by adding a source device, you’ll have to add the camera to your laptop first and allow the drivers to install so that OBS will see the device. Here are two screenshots of my device settings for my Logitech HD Cameras. As you can see I keep my cameras at 30 frames per second, this is to keep them from lagging in the video stream, as well as minimize CPU utilization.
You’ll also need to make sure you select to use a custom audio device, just like in the pic, this will allow you to use the cameras microphone, IF you want sound to be captured from the camera that is. (This is where any temper tantrums and some M0t3*#$&^r or S#*t comes in!!) Oh yah, the camera hears all!


Once you have the camera feeds setup in your main scene, you can test what the video output will be by recording a video and playing it back! Lets move onto some of the settings in OBS Studio that I’ve setup and are working well for me. You can manipulate the settings to whatever works best for you while you live stream cornhole games with OBS!
To get to the settings, goto file>settings. These two screenshots are my settings I have for the output & Video (This is what’s being displayed on the live feed or recording).


Live Stream Cornhole Games with OBS to Facebook
Now that you have everything setup and ready to go, here’s how you will connect OBS to a facebook live stream!
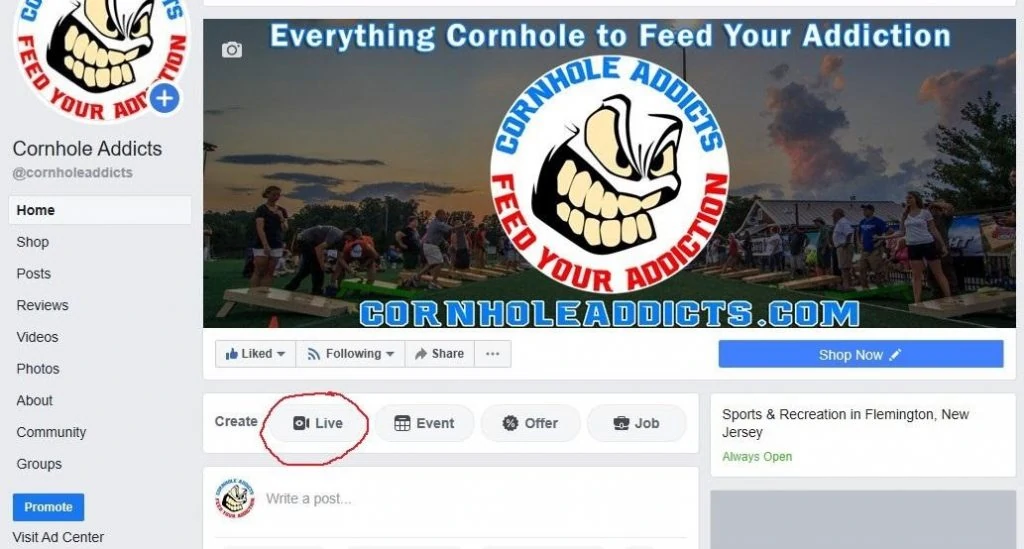
Login to facebook, you can stream from your personal page or a page that you have created. Click on Live.
Click on Connect. From here you will copy the Stream key ID. This will be used to plug into the Stream Settings in OBS. On the right side you will be able to add a description. You won’t be able to click Go Live until the OBS Stream connects. THIS KEY WILL CHANGE EVERYTIME YOU STREAM!
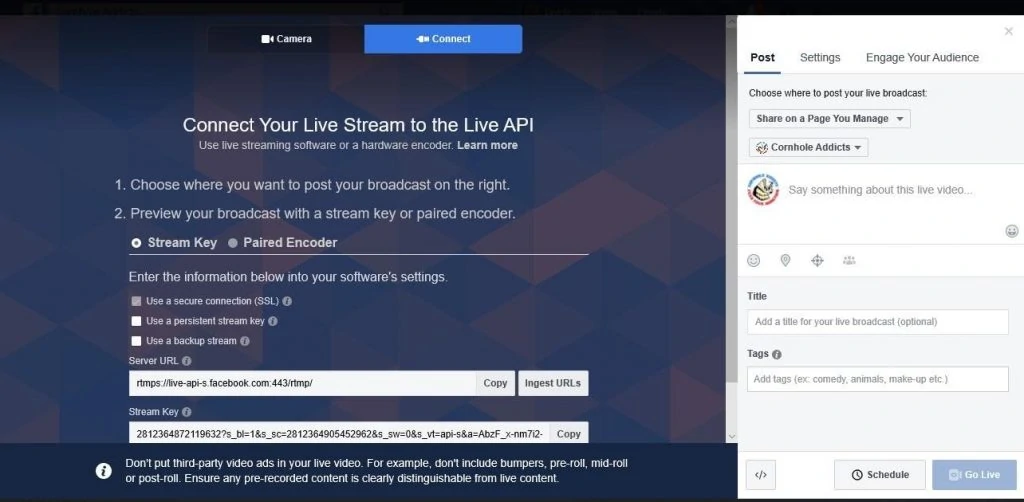
Copy the Stream key and paste it in OBS, click ok.

Once the stream key is saved, go into OBS, in the far right window, click on start streaming! You’ll get a prompt asking if you are sure you want to start streaming, click YES!!

Once OBS connects using the stream key provided to facebook, the video feed will show up, then you will be able to click on Go Live! All stream data will be shown in this window, as well as any comments that are on your live feed! And once your event is over, just end the Live feed on facebook, and don’t forget to stop the stream in OBS. OBS will automatically save all the scenes, and every setting you made under your OBS Profile, you’ll also have the option to save the feed locally to your pc for future use, and also to remain on your Facebook page.
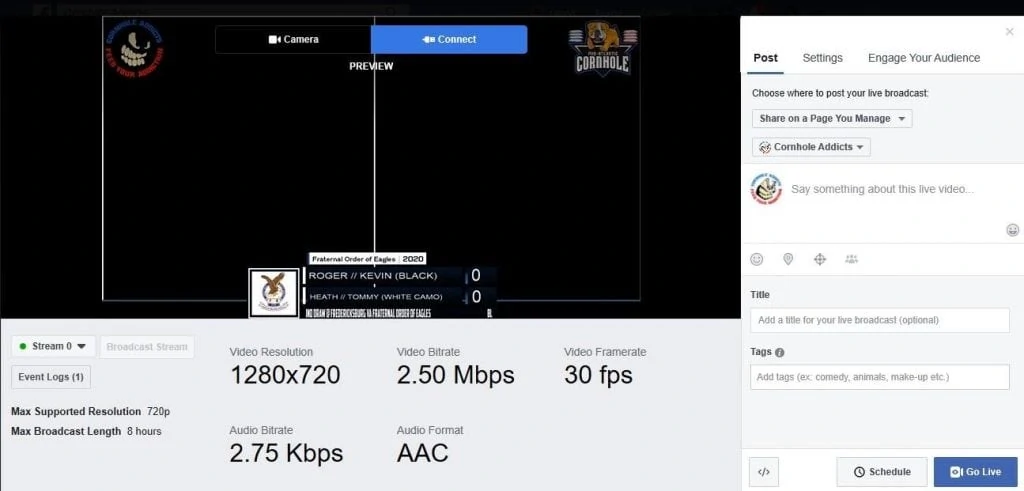
At first this may seem difficult, but after you get everything setup, and your scenes the way you want them, cameras, sound and graphics, YOU’RE ALL SET! It’s a great way to show off your league, events or local blind draws!
I hope this article has helped, I plan on doing a more in depth video tutorial in the near future that will go over in detail more settings and scenes, such as info on how to use scrolling text, graphic transitions and more! If you have any questions, please feel free to shoot me a message!
#FEEDYOURADDICTION
